Genshin.guide yoimiya has become a popular resource for players eager to harness the full potential of this Pyro archer. With her explosive damage output and lively playstyle, Yoimiya offers a unique experience in Genshin Impact. This comprehensive guide explores her builds, talents, team synergy, and advanced strategies to help you maximize her impact in any adventure.
Yoimiya Character Guide – Builds, Talents, and Team Compositions

Yoimiya’s character design and gameplay revolve around her role as a Pyro DPS who excels in quick, precise attacks combined with fiery bursts. Building her effectively involves understanding her strengths and weaknesses, which are detailed through optimized talent levels, weapon choices, and team compositions.
She functions best as a primary damage dealer, benefiting from team members who can support her in generating energy or inflicting elemental reactions. Her kit encourages swift, consistent attacks, making her ideal for playstyles that favor rapid firing and maximizing her Pyro application. To fully unlock her potential, players need to balance her talents, artifacts, and team synergy for seamless performance.
From a strategic perspective, Yoimiya shines brightest when paired with Hydro or Cryo characters to trigger powerful elemental reactions like Vaporize or Melt, amplifying her damage significantly. Her role can adapt to different team archetypes, whether as a main DPS on a hypercarry team or as a supporting element-trigger character in multi-DPS setups. Properly configuring her talents and artifacts ensures she remains versatile and impactful across various content types.
Genshin.Guide Yoimiya – A Comprehensive Overview
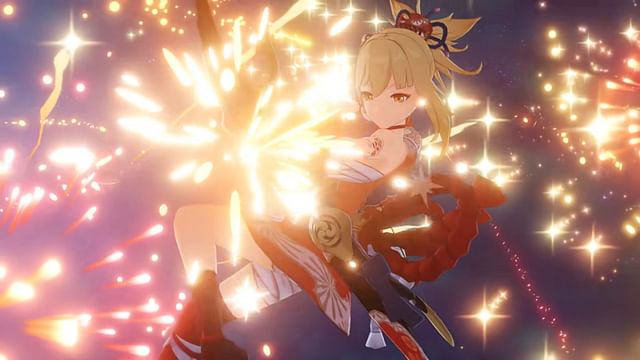
Genshin.Guide yoimiya provides detailed insights into her character mechanics, strengths, and weaknesses, making it a trusted resource for both new and seasoned players. Yoimiya’s appeal lies in her cheerful personality and her explosively charming combat style, but understanding her deeply requires a grasp of her skill interplay. Her Elemental Skill, Niwabi Firework, allows her to deploy fireworks that explode, dealing AoE Pyro damage with impressive efficiency.
One of her standout features is her exclusive passive talent, which boosts her overall damage after each shot, encouraging a playstyle that emphasizes rapid shots and precise timing. Her elemental burst, Ryuukin Saxifrage, summons a large fireworks display that deals continuous Pyro damage, making her especially deadly in sustained fight scenarios. Genshin.Guide emphasizes that mastering her involves optimizing her attack rhythms, which maximizes her damage potential during both burst phases and sustained attacks.
Furthermore, her allure lies in her personal story and thematic design, which resonates with players who enjoy energetic, lively characters that bring a sense of color and joy to their team compositions. Genshin.Guide provides tips on unlocking her potential in Spiral Abyss, Abyssal battles, and open-world exploration, showing why she’s considered a versatile and dynamic Pyro character.
Yoimiya’s Best Weapon Choices – A Genshin.Guide Analysis
Selecting the right weapon is crucial to unlock Yoimiya’s maximum damage output. Genshin.Guide recommends a balance between engageable weapons that boost her Attack, Fire Damage, or Energy Recharge—each playing a role in different team or playstyle setups. The Thundering Pulse stands out as the premier choice, significantly increasing her damage with its high Attack stat and crit rate bonuses.
For players seeking a more accessible build, weapons such as Rust or The Stringless can also perform well, especially for F2P or budget-conscious players. Rust enhances her damage against enemies below a certain health threshold, complementing her burst damage, whereas The Stringless increases Elemental Skill and Burst damage—aligning with her focus on Pyro damage. Genshin.Guide highlights that weapon level and refinement are equally important, as higher refinement levels provide substantial boosts in damage efficiency.
Lastly, Energy Recharge weapons like Skyward Harp or Sacrificial Bow can be beneficial depending on your team’s energy needs, reducing downtime and increasing uptime for Yoimiya’s burst. The right weapon choice ultimately depends on the overall team composition, especially considering whether your strategy emphasizes raw damage, energy generation, or versatility. Genshin.Guide emphasizes testing different options to see what synergizes best with your roster.
Artifact Sets for Yoimiya – Optimizing Damage with Genshin.Guide
Artifacts significantly influence Yoimiya’s overall performance, and selecting the right set can elevate her damage to new heights. Genshin.Guide recommends the Shimenawa’s Reminiscence set for players prioritizing raw Attack and damage boosts, especially if your focus is on maximizing her Elemental Skill and normal attacks. This four-piece set increases her Normal Attack damage and grants a bonus Attack bonus when triggering Elemental Reactions.
Alternatively, Crimson Witch of Flames offers a compelling option, increasing Pyro damage and increasing damage from Overloaded, Burning, and Melt reactions—ideal for pyro-centric compositions. Combining this set with the right weapon and talents amplifies her burst damage significantly. For more F2P-friendly options, a two-piece set of Instructor or Martial Artist may offer some elemental mastery boosts, which enhance reaction damage but less directly impact her physical damage.
Ensuring artifact sub-stats favor Crit Rate, Crit Damage, Attack%, and Elemental Mastery prioritizes stability and damage consistency. Genshin.Guide underscores the importance of a balanced artifact campaign, focusing on upgrading your main pieces first. Ultimately, artifact optimization involves fine-tuning sub-stats and set bonuses based on your specific team setup and playstyle.
Yoimiya Team Building – Synergy and Support Strategies Based on Genshin.Guide Recommendations
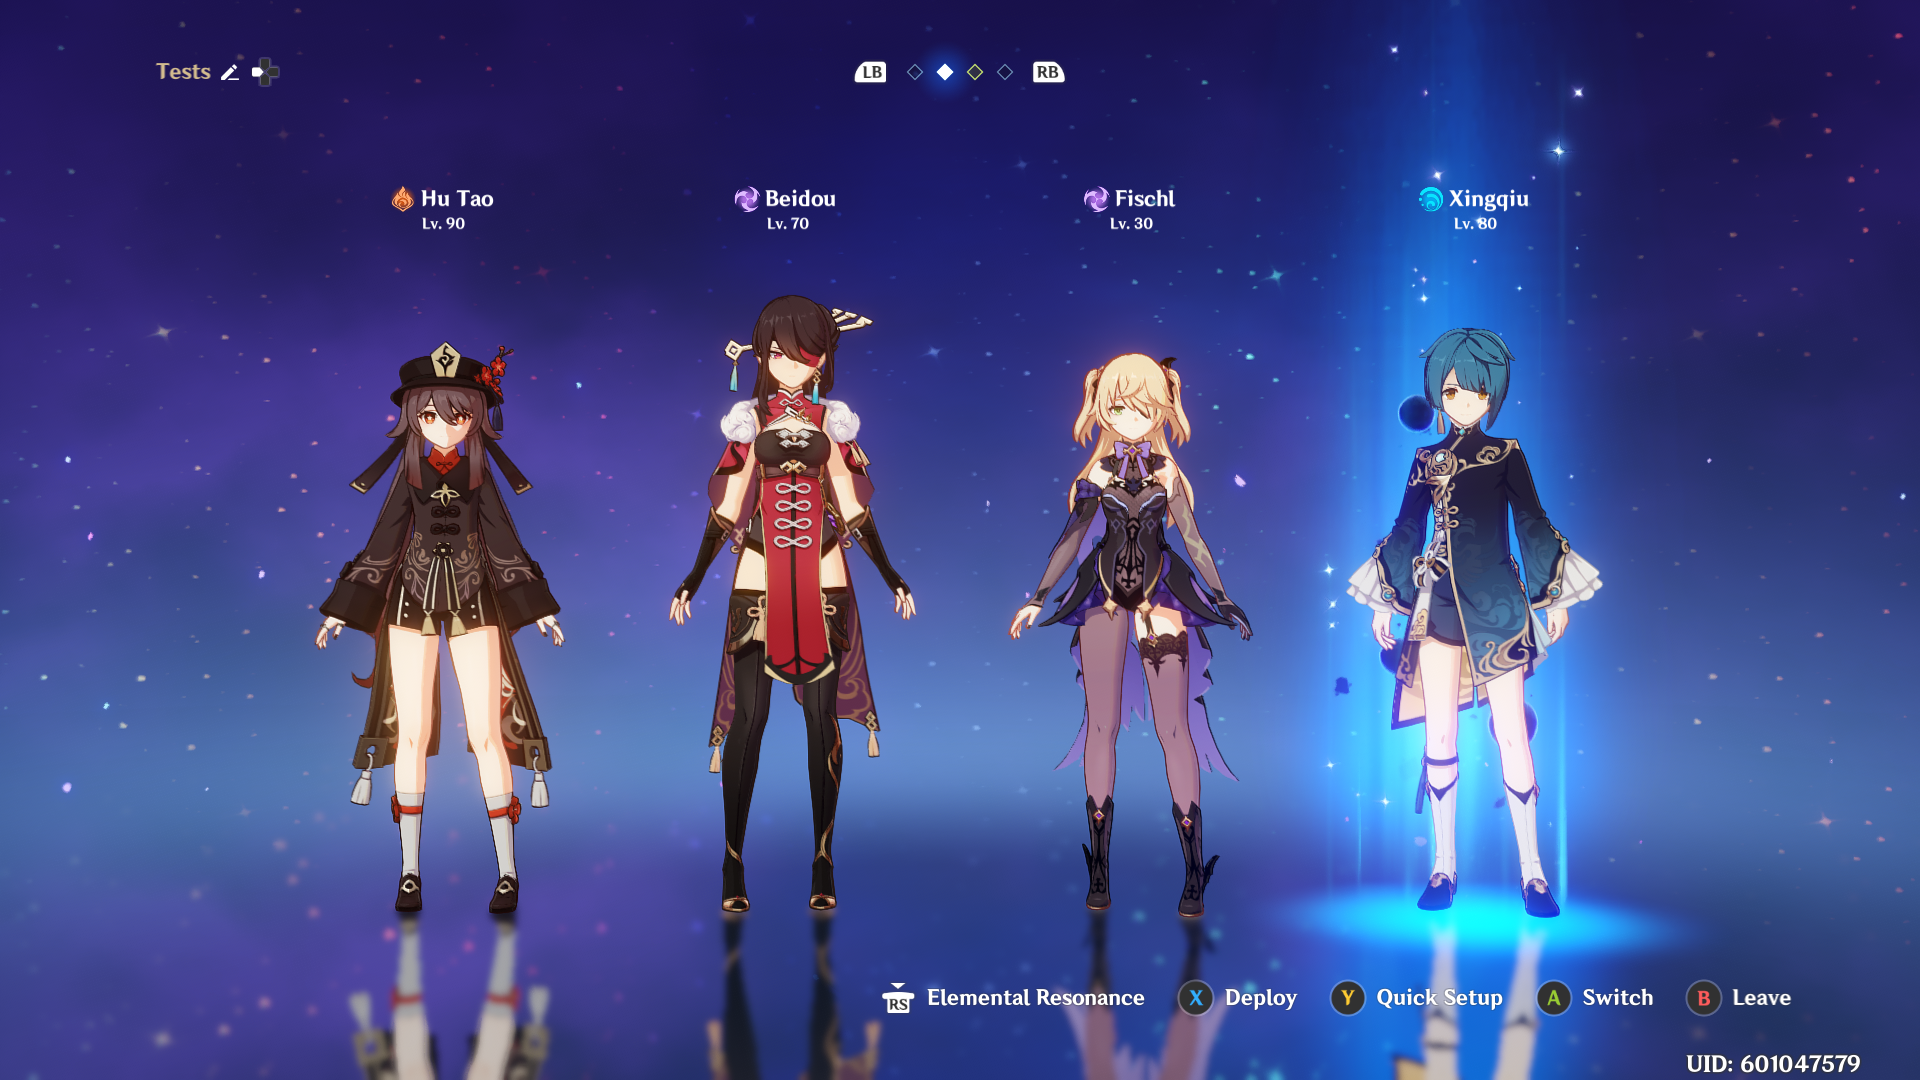
Yoimiya’s optimal team compositions leverage her strengths in dealing sustained Pyro damage while compensating for her energy generation needs. Genshin.Guide advises pairing her with Hydro characters like Xingqiu or Yelan to trigger Vaporize reactions and maximize damage output. These characters also provide additional support and damage mitigation, creating a balanced team.
Support characters such as Bennett can increase her attack through his Elemental Burst while also healing and reducing enemy resistances. Additionally, supports like Venti or Sucrose can gather enemies together, enabling Yoimiya to hit multiple targets with her AoE firework attacks. The synergy between these characters forms a cohesive damage cycle that increases Yoimiya’s overall effectiveness.
Strategic support also involves energy recharge provisions—putting in characters or artifacts that boost Yoimiya’s energy regeneration, allowing her to frequently deploy her burst. Genshin.Guide emphasizes the importance of choosing team members that complement her quick attack rhythm, ensuring she isn’t left vulnerable during cooldowns. Proper team support amplifies her DPS and ensures she remains a key damage dealer across all game modes.
Yoimiya’s Talent Priority – A Leveling Guide from Genshin.Guide
Maximizing Yoimiya’s damage potential begins with talent prioritization. Genshin.Guide recommends upgrading her Normal Attack, Naganohara Firework, first since her damage heavily relies on her straightforward shots and consistent performance. Rising her elemental skill, Niwabi Firework, next enhances her Pyro application, allowing her to utilize her personal damage buffs more effectively.
Her elemental burst, Ryuukin Saxifrage, should be leveled last due to its reliance on her basic attacks and the cooldown having a more significant impact at higher talent levels. Prioritizing talent upgrades based on her playstyle—whether as a hypercarry or supporting damage dealer—can vary but generally focuses on maximizing her main damage sources first.
Genshin.Guide recommends that players consider the available materials and resources carefully to balance between talent levels and artifact upgrades. Additionally, talents can be further refined through mini-ascensions to better adapt to team needs or content challenges. Proper talent progression directly correlates with her overall damage output and utility on the battlefield.
Genshin.Guide Yoimiya – Constellation Analysis and Impact on Gameplay
Yoimiya’s constellations unlock additional layers of her potential and versatility. Genshin.Guide explains that her C1 enhances her normal attack chain, granting her a second attack boost after her initial shot—this can significantly amplify her sustained damage when combining rapid fire with her skill and burst.
C2, which reduces her skill cooldown, allows for more frequent fireworks deployment, directly increasing her Pyro presence over combat duration. Meanwhile, C4 provides a valuable attack boost whenever her burst is active, further empowering her damage output during extended fights. However, many players consider her constellation levels more optional and focus on her talents and gear first before investing here.
Unlocking her C6 drastically increases her burst damage potential, making her the most potent she can be in sustained burn phases, especially when combined with reaction-based strategies like Melt or Vaporize. Genshin.Guide emphasizes that constellations are a secondary concern compared to talent and artifact optimization, but they serve as excellent upgrades for dedicated Yoimiya mains aiming for peak performance.
Yoimiya’s Playstyle – Maximizing DPS with Genshin.Guide’s Advanced Tips
Yoimiya’s combat style revolves around quick shots, precise timing, and maximizing elemental reactions. Genshin.Guide underscores the importance of understanding her ideal firing rhythm—using her elemental skill to place Pyro fireworks, then unleashing her charged attacks to trigger reactions like Vaporize or Melt for heightened damage.
A key tip involves maintaining mobility—her play demands positioning that allows her to safely attack from a distance without exposing her to unnecessary damage. Players should learn to weave her skill and burst seamlessly into her normal attack rotation, ensuring her elemental infusion benefits her attack chain. Using her burst strategically during mob clusters or boss fights produces devastating, sustained Pyro damage.
Advanced players can incorporate rhythm-based techniques, such as timing her charged shots with reaction triggers or coordinating team support for maximum uptime. Genshin.Guide suggests practicing attack sequencing and reaction timing, which turns Yoimiya into a blazing streak of destruction that handles both single targets and groups with flair and efficiency.
F2P Yoimiya – A Budget-Friendly Build According to Genshin.Guide
While Yoimiya’s optimal performance generally benefits from signature weapons and maximum artifact level, F2P players can develop a competitive build using more accessible gear. Genshin.Guide recommends focusing on weapons like Black Bow or Sharpshooters Oath if available, and prioritizing artifact sets like Shimenawa’s Reminiscence or The Exile to support her energy needs.
For her talents, upgrading her normal attack first is a practical choice for maximized damage, followed by her elemental skill and burst as resources allow. Artifact farm routes should focus on sub-stats such as Crit Rate, Crit Damage, and Attack%, which are essential on any Yoimiya build. The key is to optimize what you have rather than chasing expensive 5-star gear early on.
Support-wise, using characters with energy regeneration abilities such as Yelan or Ningguang can keep Yoimiya’s burst active more often, dramatically improving her damage output. Genshin.Guide emphasizes patience and incremental upgrades, encouraging free-to-play players to build around her strengths and adapt her playstyle to available resources, demonstrating that effective Yoimiya gameplay is accessible even without premium gear.
Genshin.Guide Yoimiya – Comparing Her Performance to Other Pyro DPS Characters
Yoimiya holds a unique position among Pyro characters thanks to her rapid, precise attack style and her focus on normal attack damage scaling. Compared to other Pyro DPS like Hu Tao or Diluc, Genshin.Guide shows that she is more reliant on consistent firing and elemental reactions rather than raw single-target burst damage. Her strengths lie in her mobility and her ability to deal sustained pyro damage over time.
Hu Tao excels with bursts of high damage and is more effective during low-health phases, whereas Diluc offers a more tanky, elemental burst-centric style. Yoimiya’s niche is in rapid, reaction-based damage, making her ideal for teams that prioritize reaction triggers like Vaporize for explosive, impactful damage or Melt for critical hits. Her playstyle offers a fresh approach that rewards skillful timing and positioning, setting her apart from the more straightforward Pyro characters.
Genshin.Guide compares her damage output statistics, skill rotations, and team integration strategies, emphasizing that while she may not always outperform some Pyro characters strictly on raw numbers, her utility and fun factor make her a compelling addition. Skilled players can turn her into a formidable Pyro main damage dealer capable of handling diverse combat scenarios with finesse.
Conclusion
Genshin.guide yoimiya offers a detailed and insightful roadmap to unlock the fiery potential of Yoimiya, guiding players through her optimal builds, talents, weapon choices, artifact sets, team strategies, and advanced play techniques. Her unique playstyle as a rapid-firing Pyro DPS demands mastery in attack rhythm, reaction timing, and team synergy to truly shine. Whether you are a new adventurer or a seasoned player aiming to refine her tactics, understanding her strengths and nuanced mechanics elevates your gameplay and ensures she becomes a blazing star in your Genshin Impact roster. With proper weapon selection, artifact optimization, and strategic team building, Yoimiya can become a reliable and exhilarating force on the battlefield, bringing fireworks of damage in every battle you face.
POSTER SEO_SIBATOOL